Javascript/CSS Slideshow Tutorial
This tutorial describes how to create a single photo gallery / slideshow without using Flash inside a page on your site.
-
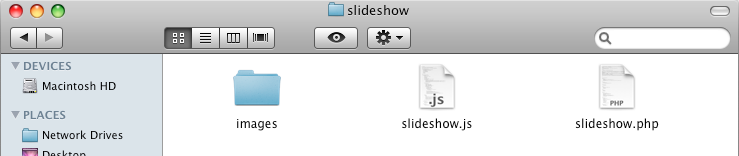
Download slideshow.zip to the desktop and unzip it. There should be an images folder, slideshow.php, and slideshow.js.
-
Copy the images inside the images folder into the images folder of your website. Do NOT copy over the entire folder; rather, copy the files themselves over.
-
Copy slideshow.php into the root of your website folder (where your index.php, etc. should be).
-
Copy slideshow.js either into the root of your website folder or the Scripts folder (if you created one).
-
Open slideshow.php in Dreamweaver. We will be working primarily in Code View, but you may also use Split View if your screen is big enough.
-
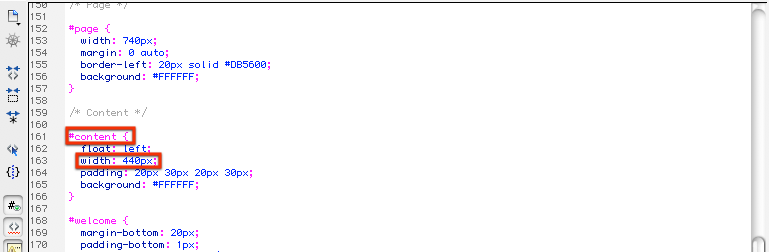
Find out how wide the content area of your particular site is. This should be in your CSS styles in the top part of your template, probably under #content or #entry.
-
At the top of slideshow.php, you should see an area labeled "IMPORTANT: SET YOUR OWN VARIABLE VALUES HERE". Where is says $width, enter the width of your content area that you determined in the previous step. Use numbers only and do not delete the quotes. This sets the width of the larger picture area.
-
You will also need to set the $height of the picture area. It is recommended that you set it to be around 2/3rds of the width to maintain a normal photo proportion. So, for example, if your width is 600, you should set your height to 400.
-
Set the rest of the variables according to the descriptions in slideshow.php. You should be able to find most of the colors you want in your CSS styles.
-
Scroll through the code until you see "start picture definitions". This should be around line 177.
-
Edit the picture paths and descriptions to what you need them to be. Copy and paste what you need and edit accordingly.
NOTE: Although this slideshow will automagically resize your images so that nothing completely breaks, you may find that some things look a little funny if the image is more than 50% wider than it is tall. It is recommended that you resize and/or crop your image down to the same height and same width or narrower (but not shorter) as the $width and $height you defined at the top of slideshow.php. You should resize that image to be 75 pixels tall for the thumbnail. The thumbnail may be any width.You should always link to a high resolution image from an image optimized for web viewing in any case. -
Save your changes and put the file on your site. Go to it on your site to see what it looks like on its own (likely located at http://www.yourdomain.com/slideshow.php). If anything is broken, check slideshow.php before proceeding.
-
Next you will insert the slideshow into a page on your website so that it is within your template. Create a new page using the layout you should have used for your index.php and contact.php.
-
In the place you would like to put the slideshow, insert the following code:
<!-- width should be the width of the content area; height should be the height of the large photo area in the slideshow ($height) + 105 -->
<iframe style="width:WIDTHpx; height:HEIGHTpx; border:none; margin:0; padding:0; overflow:hidden" src="slideshow.php"></iframe>
Replace WIDTH and HEIGHT with the appropriate values. For example, my content area width is 440 and my photo area height is 260. I will put 440 for the width and 365 for the height. -
Save and put this new page on your website and view it in a browser. Make any other tweaks as needed.